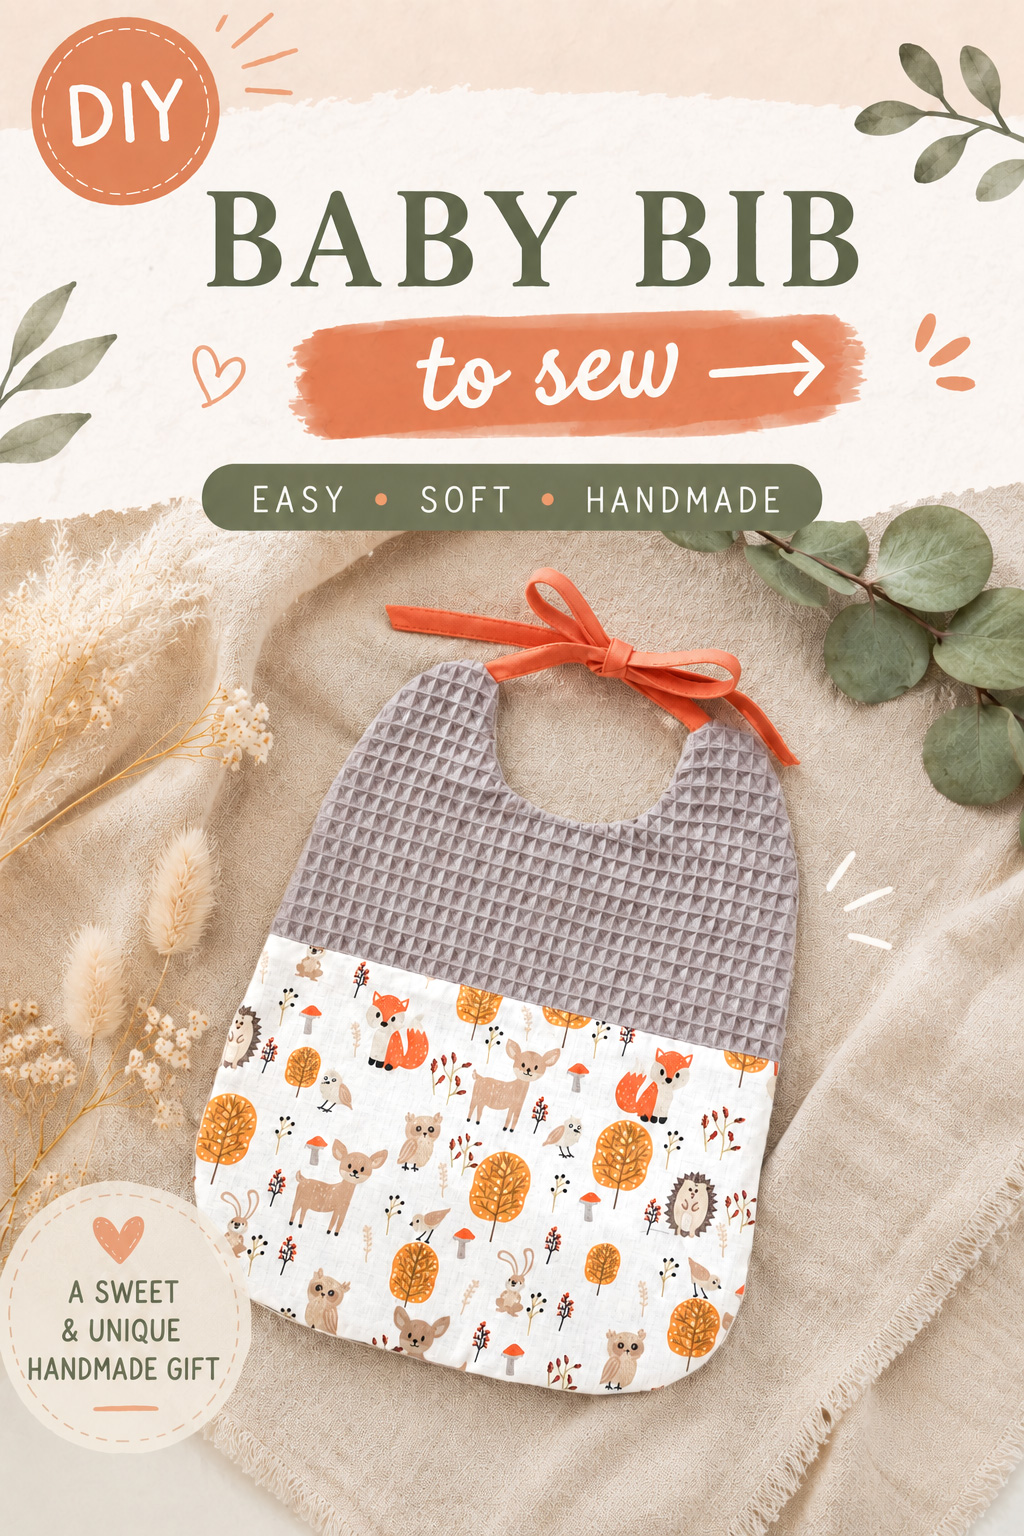
Want to sew a cute baby bib? In this tutorial, I’ll guide you through each step to create a design that’s both practical and a little different.
👉 You can also watch the video tutorial by clicking here.
Materials & Supplies for Sewing the Baby Bib
In addition to your sewing machine and basic sewing supplies (needles, scissors, pins, ruler, etc.), you’ll need:
- a 40 × 30 cm (15.7 × 11.8 in) piece of printed cotton fabric
- a 40 × 80 cm (15.7 × 31.5 in) piece of terry cloth or waffle fabric
- 70 cm (27.6 in) of 20 mm (3/4 in) wide double-fold bias tape
- polyester sewing thread matching the terry cloth and bias tape
- a Frixion erasable pen
- and the printed PDF sewing pattern.
1. Assemble the PDF Sewing Pattern
After printing the pattern on A4 paper, make sure the scale is correct by measuring the sides of the test square.
You can then cut out the 3 pattern pieces along the outlines. The terry cloth pattern piece needs to be assembled: align the 2 sections along the joining line, then tape them together.

2. Cut the Cotton Fabric
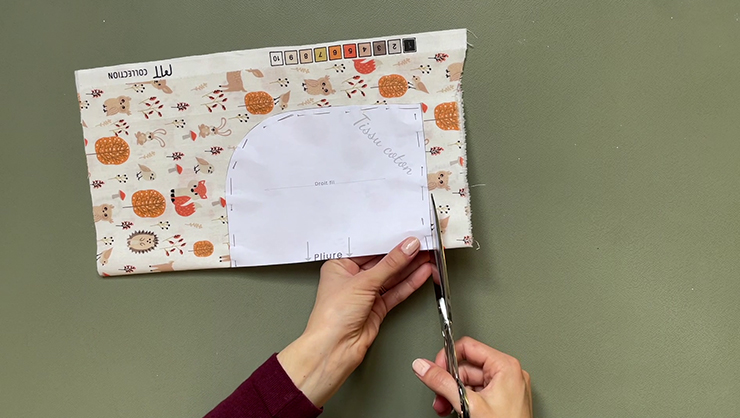
Fold the printed cotton fabric in half. The fold should run parallel to the grainline. Place the Cotton Fabric pattern piece on top, carefully aligning it with the fold as shown. Pin everything in place, then cut the fabric with your scissors positioned against the edges of the paper pattern.
3. Cut the Terry Cloth
Repeat the previous step with the terry cloth or waffle fabric, using the pattern piece labeled Terry Cloth.
Before removing all the pins, use your Frixion pen to transfer the two tie placement marks onto one side of the fabric. Then insert four pins through the fabric at the ends of these markings to transfer their position onto the opposite side. You now have the back of the bib.
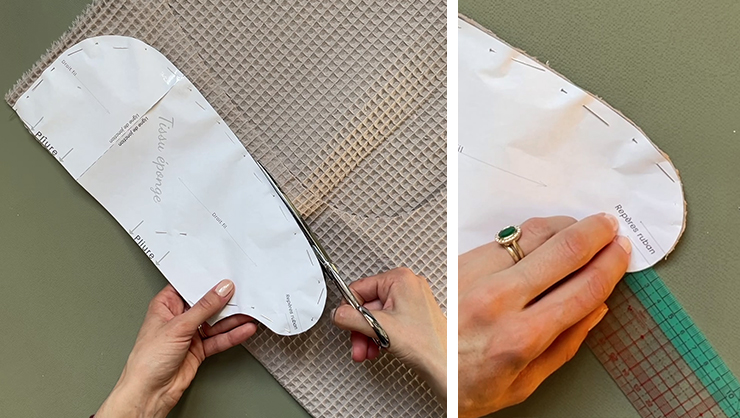
Use the Terry Cloth pattern piece once more to cut out a second identical piece. This time, however, don’t transfer the tie placement marks. This will become the front of the bib, where we’ll now sew the printed cotton piece.
4. Sew the Printed Cotton Panel
First, we need to draw a placement line so you know exactly where to position the printed cotton piece.
Place the Cotton Fabric pattern piece on the front of the bib, aligning it with one of the corners. Along the exposed side, begin drawing a line 2 cm (3/4 in) below the edge of the pattern piece. Remove the pattern so you can continue the line all the way across.

Next, position the printed cotton piece along the line you just marked, right sides together. Pin it in place, then sew with a straight stitch using a 1 cm (3/8 in) seam allowance.
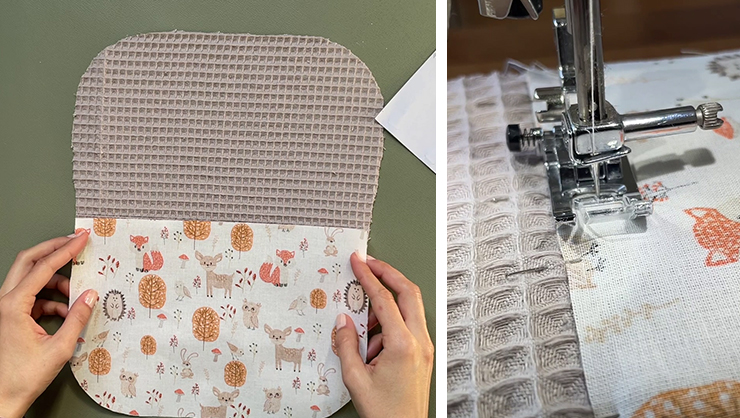
Remember to secure all your seams by backstitching a few stitches at the beginning and end.
Fold the printed cotton panel over to the right side and press the seam with your iron.
5. Prepare the Bib Ties
At both ends of the 70 cm (27.6 in) piece of double-fold bias tape, make the following folds:
- trim off both corners
- fold the end of the bias tape inward
- fold the two newly created corners toward the center
- then fold the bias tape in half lengthwise
- secure it with a pin.
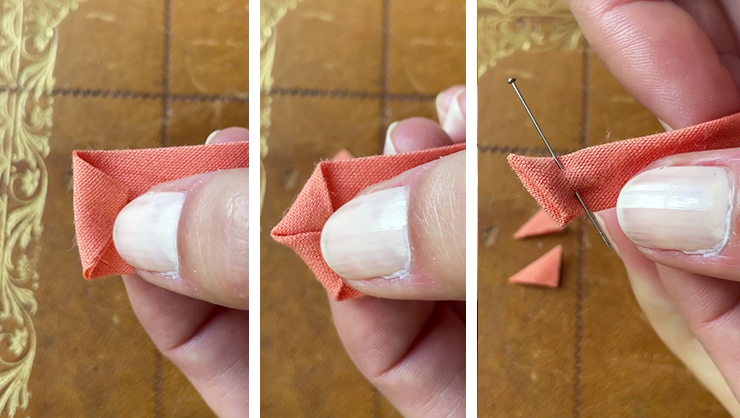
On your ironing board, finish folding the bias tape along its entire length and press it in place. Pin approximately every 5 cm (2 in).
Finally, cut the bias tape in half to create two 35 cm (13.8 in) bib ties.
6. Sew and Baste the Bib Ties in Place
Using a straight stitch, topstitch the folded bib ties approximately 2 mm from the edge. When you reach the end, keep the needle down, lift the presser foot and pivot the fabric so you can continue topstitching neatly around the corner.
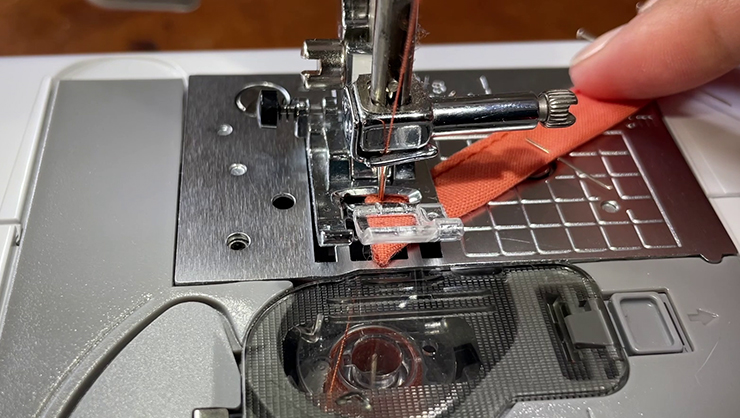
On the back bib piece, position the ties between the placement marks and align them symmetrically with the edge of the bib. Pin them in place, then baste them to the bib 5 mm (3/16 in) from the edge.

7. Assemble the Baby Bib
To keep the bib ties out of the seam, pin them toward the center of the bib. You can also add a few pins to the right side of the printed cotton panel to keep it securely in place.
Place the two bib pieces right sides together and pin all the way around.
Important: leave a 10 cm (4 in) opening along one side of the bib so you can turn it right side out after sewing. Just above the seam of the printed cotton panel, mark the section that must remain unstitched.

You can now sew all the way around the bib with a straight stitch using a 1 cm (3/8 in) seam allowance, leaving the marked opening unstitched.
8. Clip the Curves and Turn the Bib Right Side Out
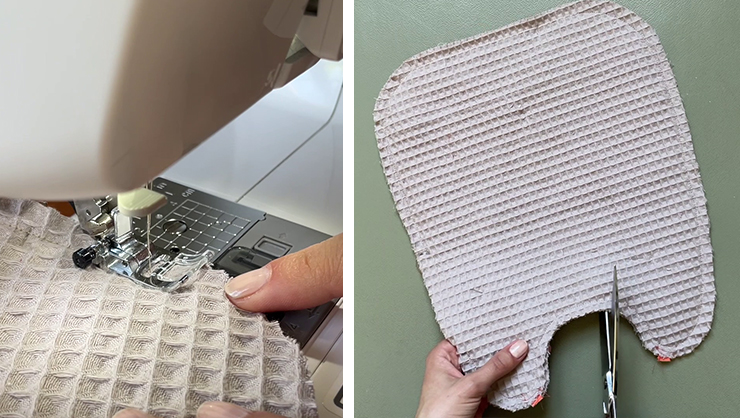
Using a pair of scissors, clip all the curves, taking care not to cut through the stitching.
Next, reach through the opening and turn the bib right side out. Gently work out the edges and curves so the bib takes its proper shape.
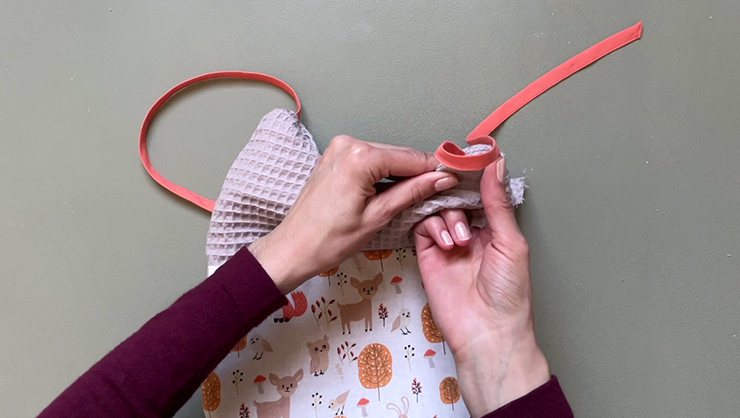
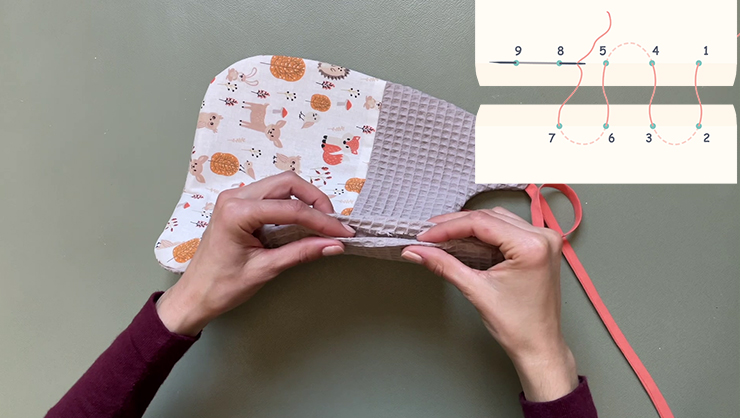
9. Close the Opening with a Ladder Stitch
The final step is to hand sew the opening closed with a ladder stitch. Make sure the stitches on either side of the opening are positioned directly opposite one another.
If you like, you can now topstitch all the way around the bib with a straight stitch to help keep the fabric layers securely in place.
Well done, your baby bib is finished! I’m sure it will keep baby comfortable at mealtimes and bravely survive all the little adventures that come with starting solids 😁